2. Setup in Steel Projects PLM
Not version-specific
Tekla PowerFab
Tekla PowerFab GO
From the "Fabrication Job data" tab click "Import"
Image

Next to "Link" enter a work order name and click "New"
Image

From the Type dropdown select FabSuite - Nest request import
Image

Select the directory where Tekla PowerFab exports the nest request.
Image

Click Save, then Quit.
Click Import again.
Image

For Link enter a name for the cutlist import then click New.
Image

For Type select FabSuite - Plugin - Cut list, then click Options.
Image

Open your Tekla PowerFab Remote Monitor and click Settings. You will need the IP Address and Socket Port for the next step.
Image

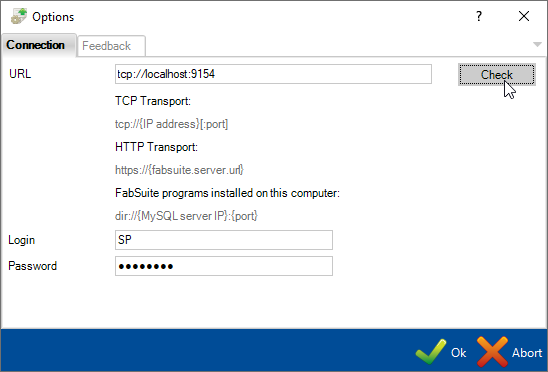
Back in PLM in the Options window, enter "tcp://" then the IP address followed by a colon ":" then the port found in the previous step. Enter your remote user login and password from Tekla PowerFab. Click Check to verify the connection.
Image

Next select the Jobs and pcs tab. Check "Show only valid cut lists" and "Show only shared cut lists". The other settings are optional depending on your workflow.
Image

Click OK, then Save and Quit.
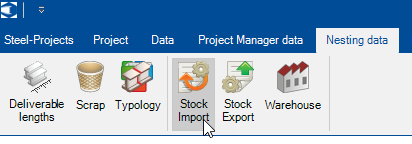
Select the Nesting data tab, then click Stock Import.
Image
Image
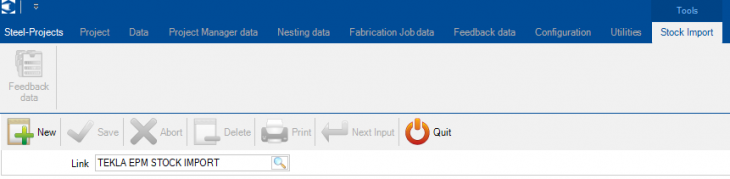
For Type select FabSuite - Plugin - Inventory, then click Options.
Image

Enter the same URL, Login, and Password as in the step above, then click "Check" to verify the connection. Options under the Parameter tab will depend on your workflow. Check with Steel Projects support if you have any questions. Click OK when done.
Image

Click Save and Quit.
Next select the Feedback data tab and click Export.
Image

Image

For type select FabSuite - Plugin - 4D, and select an export directory. Then click Options.
Image

Under Options Connection tab enter the same URL and remote user and password as in previous steps. Click OK.
Image
Save and Quit.